Completed My First Project! What's Next?!
I finally finished my first guided web page! You can find my work here.
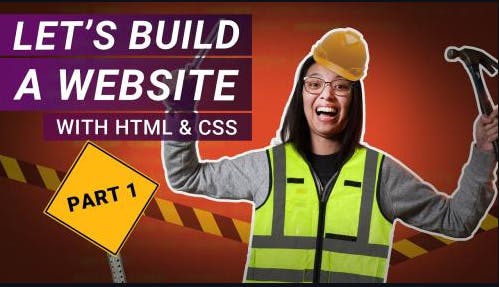
This was done following a guided tutorial from Coder Coder's Jessica Chan. You can find the video I followed here:
If there is ever a guide to getting your toes wet and learning the basics of front-end development, I would start with this project first. For one, very little is edited out regarding her thought process and workflow when designing an actual web page. Several times throughout the video, she pauses to look things up, and learning how to look things up is a useful skill to learn. And speaking of useful skills to learn, if you do decide to go down this road, there are a few things to keep in mind. The mindset you must have as a student isn't to learn how to recreate this project one-for-one, although you do eventually want to arrive here, our first "non-guided" project will have us starting with much simpler ideas and slowly build our toolkit and get familiar and comfortable with navigating around the IDE (such as VS Code or Sublime) and putting ideas onto the web page. So what are some things to keep in mind when doing your first guided project?
Follow Both Visual And Audio Cues
Something I noticed not long after starting this project is that it's very easy to become reliant on her vocal instructions. At times I'll try to type along, glance at my IDE, and she would speak in generic terms, using nondescriptive words like "this" and "that", and if "this" ends up not being the element you're working on, you'll accidentally misplace elements in the wrong category, and sometimes even have whole items missing altogether. Watch a small batch of instructions, pause the video, and follow along on your IDE, then resume the video again.
Learn The Hotkeys For Youtube
Jessica moves quickly. There is some degree of expectation that you know the basics of how to use an IDE. Likely some of it was due to the fact that she briefly forgot that she was working on camera and started working as she would on any normal non-instructional project. Several times throughout the video, you'll see her zipping through the IDE, deleting, cutting, pasting, and moving things around at a very rapid pace. Pause the video, hit "J" to go back 10 seconds and "L" to go forward 10 seconds. For the moments when you need the exact frame, the "<" key on your keyboard (next to "M") will go back just a single frame and likewise the ">" key will go forward a single frame. Tapping on these keys will let you have finer control of the video.
If the above worries you that you'll be too novice to learn from it, don't be. She still does an excellent job explaining and re-explaining the core concepts as you make your way through the project. And if you see something you don't understand, but she doesn't explain it either, here is an opportunity!
Google Along With Her

There is a wealth of knowledge to be gained from learning how to navigate CSS, Sass, and how to use mixins for your project. Not to mention using padding, margins, flexbox, and grid. You could almost fall into a rabbit hole learning each new thing as you go. But the important thing to note is that the goal is NOT to memorize these things. Rather, just keep it in the back of your mind that these are tools you can use. This means instead of trying to memorize, say, the key term "breakpoints", just have the general idea in your mind "Oh, I can make the website behave a certain way when I shrink the window down or when I make it big again." Knowing the functionality is more useful because you can google it later when you want to use it again, and that will be when you learn the finer details to make coding easier on subsequent passes.
What To Do During Mistakes

Counter to what you might expect, you actually WANT to make mistakes. This is where the meatiest part of learning how to code will come in. And thankfully Jessica's fast-paced movement lends itself to plenty of errors. I may even publish my error-prone code at some point for people to work through. But when you see your project looking different from hers, don't move on and hope for the best. Resolve those issues before resuming as this is the best chance to get an actual on-the-job experience and these stories will translate well during your interviews when you talk about problems you faced and how you overcame them. I've compiled a list of things to watch out for when troubleshooting your own code.
Look For Errors In The IDE
The IDE will often output errors that you can see depending on the kind of IDE you use. In VS Code, there are separate sections for "Problems", "Output", "Debug Console", and "Terminal". Quickly look through each of these and make sure your IDE hasn't caught anything you've missed. Often it will even give you the exact line number where the issue was caused.
See What Is Different Visually
Sometimes the difference won't lie with a function of the website, but something visually seems off, like the margins are too high or the image alignment is off. These issues won't trigger any bugs because there's nothing wrong with the logic of your code. In such cases, try to find those parts of your code and see if you had accidentally input the wrong value. Knowing where to locate specific parts of your code and what each element does is an important skill to have when debugging your project. If the nav bar is too thick, you'll need to know how to locate the nav bar elements in your code, as well as any parent elements to ensure that the problem doesn't lie somewhere more fundamental to your codebase.
Ask Around In The Coding Community
This tutorial was based off coding challenges presented in frontendmentor.io. On the bottom of the page, you'll find a link to their slack channel. If you're not in a place where you know many software developers in your neighborhood, this is the next best place to make connections and ask questions. Take screenshots, learn how to upload your work to github, and try to be as descriptive with your problem as possible. Include what you had done to try to solve the issue, and what you want the end goal to look like. Also this is a great place to practice your own troubleshooting skills. Many beginners will look for help there as well, and it's a great place to lurk around and see if you can find any issues you can resolve.
If All Else Fails, Look At the Final Source Code.
Depending on your instructor, they may include a link to the finished project on github. Jessica has done this for this landing page here. But something to note is that you do NOT want to go around and change everything that's different from your code, especially if you're not done with the project yet. If you're still in the middle of your project, the chances are that you'll find large chunks of code that are new, changed, or rearranged from what you currently have. Most of it won't have anything to do with your error or issue. Likely all of the new changes you'll find in the finished code will be material that the instructor hasn't yet covered. Be careful what you decide to change!
Just like earlier, try to find the specific parts of the code that relate to the issue you're having and nothing else, whether it's the hero section, the navbar, or the articles. Once there, when you find a change that's not in your code, prioritize the items that will have the smallest effect on your code to the greatest. For example, you want to start with changes to the ordering of code first, that is, the contents of lines 45 and 46 are unchanged, but you have to swap them. Then you might move on to adjustments to already existing variables, before finally touching any code that is new or deleting vestigial code. And when you do make these changes, you want to first experiment from the dev tools of your browser before making any changes from your IDE directly. Most commonly this is done by opening your web page on the browser, right-clicking on the problem element, then clicking "Inspect". This will open up the dev tools (usually on the right-hand side), where you can make adjustments to your code. It's a good idea to familiarize yourself with this environment, as this is the safest place to make large changes to your code at no penalty since these changes won't be saved.
When making changes to your code, whether it's from the dev tools or from the IDE, make sure to revert said changes once you've discovered it doesn't resolve your issue. Do this edit by edit. The last thing you want is to have made 5 or 10 changes to your code, and not be able to tell what exactly it was that resolved your problem. This is why the hierarchy of changes from least impactful to most is necessary to ensure minimal damage to your project, and that it does not make the problem worse when you accidentally change something that multiple other elements depend on, thus only worsening your problem.
That's it! Above all else, have fun! Don't sweat trying to memorize every little thing. Rather absorb the information in big picture ideas such as "I can make a page responsive by shrinking the window" or "I can use CSS to add cool hover-over animations." The idea is to make each skill you learn "Gooogle-able". As long as you know that it can be done, it can be Googled and learned later. And you will learn more from that Googled experience later.
What's Next For Me?
As for my next steps, I will make a web page of my own! This time, no guided tutorial. But it's important to not fall into the trap of "I need to make my first web page as impressive as the one in the guided tutorial". There are a lot of concepts I didn't pick up on my first attempt, but this is expected and completely okay. The first objective is to get comfortable putting images on a page, a navbar, and maybe a footer. Those three things will be all I focus on for this first project. And it's going to look very bare-bones. But the point is to grow my confidence with the available tools I'm familiar with. Get really good at the fundamentals of designing a web page. And that means I have to do away with the notion that there's a "correct" way to build a site. Yes, there are wrong ways to write code; they will produce errors if unaccounted for. But to think that I have to build sites exactly the same way I built them in the tutorial is a trap, and the sooner I can become comfortable building sites without guided instructions, the faster my path will be towards mastery.
As I go, I will add updates on things that I learn, my philosophy towards my approach, and how I think my experience could help the beginner developer. I may even upload my faulty buggy code for other beginners to look at and try to solve. I hope you will follow me along in this journey as I clumsily work my way through coding my first page.


